I recently started to take an interest in stitching together photos to form panoramas.
The process is not that difficult, but some photos can be more problematic than others.
So here are a few tips.
All you really need is a digital camera and some software. I came across some free, cross platform, photo-stitching software called: Hugin
I'm 99% sure this is pronounced 'hoo-ginn' (not 'hug-in' or 'hoo-gin' of 'hoo-jin') and named after some old Scandinavian dude.
take a few shots
The idea is that you take a few photos that overlap, and then use the software to magically stitch them together to form a bigger image over a wider area. The results you get will depend upon the subject and how you took the photos. The main problems are:-
- parallax error; you basically get this problem due to moving the camera position between shots, especially if you have foreground objects, which appear to change their relationships with background objects.
- cropped image height; if the camera is tilted between shots, your will end up with a long image with a jagged top and bottom. This will need to be heavily cropped.
- exposure variations; if set to 'auto' your camera may try to correct for changes in lighting, giving some images that are lighter/darker and maybe some with apparent colour casts.
I think it is better (for simplicity) to start with a good technique for taking a set of photos for a panorama, even if you subsequently choose to experiment. So to overcome the parallax and cropping issues, its better to use a good camera support, rather than just holding it in your hands.
Instead of lugging a tripod around, I found I could use our lightweight monopod, and keep it vertical using the camera's green 'left-right' & 'back-forward' level display.
 |
| Monopod + Olympus camera with level display |
The level display can be reset; so I can tilt the camera to desired angle, then reset "level" condition to this new angle.
So for a 180 degree horizontal panorama, it was just a case of leveling the camera, taking a shot, turning the camera a few degrees to the right, leveling again and taking the next shot (...and so on).
For an arc of 180 degrees I took 8 shots with a 14mm lens on my Olympus micro-four-thirds camera to ensure sufficient overlap. But naturally the focal length of the lens (and hence the angle of view) will affect the number of shots you need.
In order to avoid any exposure variation, I just set the camera to manual mode. It is also important to maintain good focus, as it is easier for the Hugin software to find matching reference points if all images are sharp.
All images in this set of photos should be jpegs containing EXIF data, as Hugin needs information such as focal length and image size to work its magic. Do not edit these photos prior to stitching.
creating a panorama
The easiest way of creating a panorama in Hugin is to use the "Assistant" mode.
Start Hugin and select menu Interface > Simple and select the Assistant tab.
Click the first button "1. Load Images..." and add all photos in the set.
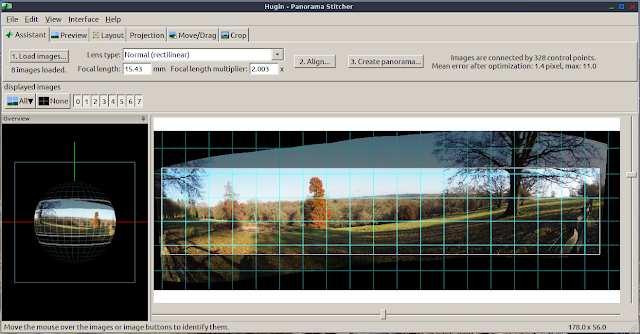
The Assistant will then run for a few moments then show a preview.
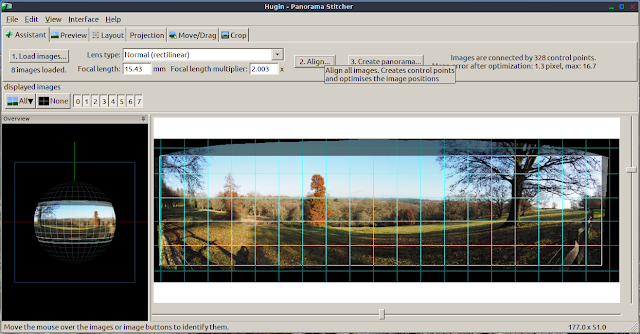
Now hit the 2nd button "2. Align..."
...and finally button "3. Create panorama..." which will do its stuff after asking for a project file name and an output prefix (accept the defaults in both cases).
Once complete you will probably end up with a TIFF file of the complete panorama which can be edited, reduced in size and/or converted to a jpeg.
conclusion
With a good set of photographs, Hugin can produce a good result with very little user effort. This software also has the ability to do much more (checkout the Hugin website and search for Hugin tutorials on Youtube).
It certainly saves a lot of time if a bit of effort is put into producing good prime images. However, even if you carefully rotate a camera on either a monopod or tripod, the camera is not being rotated at the correct point.
So if you are really keen you may want to consider getting a panoramic head, which off-sets the camera on the base, so it effectively rotates about its lens, rather than some point on the camera body.


No comments:
Post a Comment