This Hat sits on a Raspberry Pi and contains 64 LEDs in an 8 x 8 grid format.
The documentation says that the LEDs are very bright "...bright enough to cause eye pain... possibly retina damage..." ...so I wondered if they had a use in photography.
This post details some experimentation, some Python code, and a few photos.
I'll also mention an alternative way to connect it to the Pi and power the device.
 |
| Gimping my RoboBuggy |
Background
The Pimoroni Unicorn Hat is a multi-coloured display board, where individual LED colour and brightness can be controlled via a Python library. There are also plenty of code examples which demonstrate the flexibility and update speed of this device.
My board turned up inside the envelope of a Birthday card, and it only took me 45 minutes to find the information on Github, download the software, plug the Hat into a Pi B+ and get it running.
Yes, it's bright! When I tell you that the brightness range is 0 to 1 and the demo programs generally use 0.1, this may indicate why I've been nervous about setting it higher than 0.3.
Putting on my top hat, tightening up my white [cable] tie
A Pi Hat is a board that connects directly to the GPIO connector and sits above the Pi (like a hat). This arrangement works very well with the Unicorn for low brightness settings, where the current drawn from the Pi power supply is relatively low.
I took one of the demo example programs and modified it to create strobe.py.
I then took a few test shots with the Pi + Hat hanging over the side of my desk, flashing a short (10ms) burst of light, while trying different repetition rates in the range 100 - 800ms.
 |
| ...then I had to wait until it was dark! |
I had to fiddle with camera and Unicorn settings until I got something like this...
 |
| Camera shutter was open for 1 second |
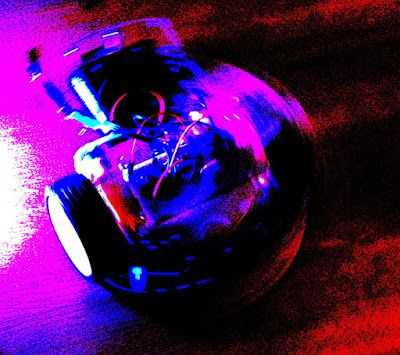
..which I then turned into the "poster" shot (using The Gimp) at the top of this blog.
Taking this further, I'd like to increase the brightness so I can increase the lighting area. But as you increase the brightness, so the supply current increases, and you soon notice that little multi-coloured square on your monitor telling you that the 5Volt supply is dropping below the Raspberry Pi lower limit.
If you are pulsing the Unicorn on/off at high brightness, then you are effectively modulating the 5 Volt supply to the Pi...not a great idea!
As I'd like to run my photo-strobe light at high brightness levels, I decided a separate power supply was needed.
Another way to connect
The Unicorn is only driven by one PWM output from the Pi gpio. So I decided to disconnect the Hat from Pi gpio connector and solder my 2nd power supply connections directly to the Hat.
I connected the Unicorn to the Pi with just two jumper leads.
Pi physical pin 12 to Unicorn pin 12
Pi physical pin 6 to Unicorn pin 9
I say "physical pin" to avoid any confusion with gpio Pin terminology.
I also cut one end off of a USB cable and soldered the 5V lead to Unicorn VCC pad and the 0V lead to the Unicorn GND pad.
This USB cable was connected to a "Hauwei" phone charger (a 5V supply module at 1A with a USB socket).
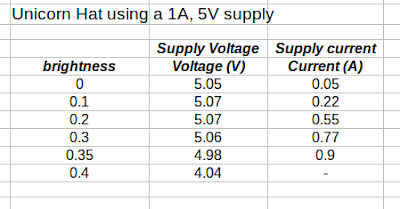
I modified the Python code so that all Unicorn LEDs were on continuously, and at each step I manually changed the brightness value in the code and re-ran the program.
I used a basic multimeter to record the following data.
These results show that the power supply supported a Unicorn brightness setting of 0.35, but somewhere between 0.35 and 0.4 the power supply starts to collapse. So I'm probably going to need a 3A power supply to get all the way to maximum brightness for continuous running.
However, I don't need continuous running, I'm just looking for (say) a 10ms pulse with a 200ms repetition rate. So maybe the black Huawei brick will do!
The next step is to put the camera on a tripod, wait until its dark, and then take some more photos.


No comments:
Post a Comment